
Motor Court Motel
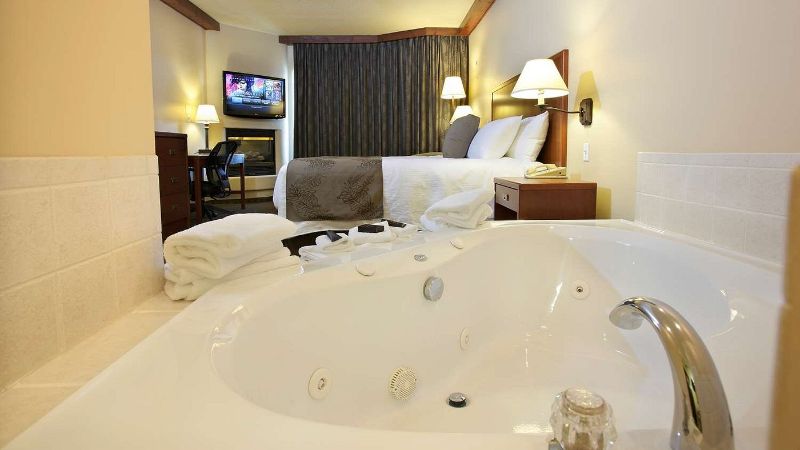
Jacuzzi in bedroom
About this hotel
2-star hotel
Classic roadside motel offering hot tub in room, cable TV, and free parking in London, Ontario.
Verified jacuzzi room · Room with private hot tub
Superior Suite with Hot Tub
Room with private hot tub
- Room sizeSize
- 398 sq ft
- Sleeps
- Up to 2 guestsUp to 2
- Main bed
- 1 king bed1 king
- Tub placement
- Private bedroomBedroom
Hot tub verified: October 2026
Amenities
Property amenities
- Free Parking
- Free High-Speed WiFi
- WiFi
- Hot tub
Room features
- Air conditioning
- Seating area
- Telephone
- Kitchenette
- Microwave
- Refrigerator
- Bath & shower
Room types
- Smoke-free rooms
Where this hotel sits on price
The 5 London, Ontario jacuzzi hotels on our list go from US$47 to US$162 a night.
Avg US$86This hotel US$50
US$47 cheapestUS$162 most expensive
Location
1883 Dundas St, London, OntarioOpen in Google Maps
Travel & access
- Metropolitan Area Airport2.4 mi
- Toronto Pearson Intl Airport90.8 mi
Nearby restaurants
- Luan's Seafood & Grill13 min walk
- Delmar Restaurant13 min walk
- Smokin'Joe's BBQ3 min walk
- Qdoba7 min walk
Things to do nearby
- The Walter J. Blackburn Memorial Fountain8 min walk
- Gibraltar Weekend Market11 min walk
- Players Sports Hub, Bar and Grill9 min walk
- K's Sports Lounge and Grill15 min walk
More jacuzzi hotels nearby
6 other hotels with a private in-room tub close to Motor Court Motel.
 7.2Knights Inn LondonJacuzzi in bedroom1739 Dundas St. E., London, Ontariounder 1 mi awayUS$47 /night avg.
 9.4Idlewyld Inn & SpaJacuzzi in bathroom36 Grand Ave, London, Ontario4.1 mi awayUS$162 /night avg.
 8.8Best Western Plus Lamplighter Inn & Conference CentreJacuzzi in bedroom591 Wellington Rd S, London, Ontario4.4 mi awayUS$101 /night avg.
 8.4Staybridge Suites London By IHGJacuzzi in bathroom824 Exeter Road, London, Ontario5.6 mi awayUS$68 /night avg.
 7.2Comfort Inn St ThomasJacuzzi in bedroom100 Centennial Ave, Saint Thomas, Ontario16 mi awayUS$90 /night avg.
 8.6Elm Hurst Inn & SpaJacuzzi in bedroom415 Harris St, Ingersoll, Ontario16 mi awayUS$145 /night avg.
Ready to book your jacuzzi getaway?
Check the latest prices and room availability for Motor Court Motel.